
Paper Mache Tropical Island - Part 1
- Mar 12
- 2 min read
This is a little step by step guide into how I created this paper mache island, with the help of my two daughters.

This all came about one cold, wet, grey February half term, when we were in need of a project. One of my daughters was obsessed with dragon themed adventures, the other with mermaids and both loved play figures such as Playmobil. With a pile of empty boxes we decided to create a paper mache island that could be used for a multitude of games.
We started by drawing our island base on a large cardboard box and cutting it out. Of course, this is where you could make your island as large or small as you like, as well as any shape.

One of the features that both girls wanted was a cave, so we repurposed a cat food box (although any box would do) and drew where it would go on the base. We also added a hole in the top of the cave.

Our vision was that there would be steps rising up from the beach to a platform on top of the cave. To do this we used the rest of the boxes to cut out tiers for the island. We started with one just a little smaller than the base, and then got smaller and smaller as we went, until the last "step" was onto the top of the cave itself. I added multiples of each layer so that each step was a decent size. I also taped the layers together to stop them moving. On one side we decided to add an overhang, ready for a surprise feature later in the make.
As each layer was added we drew round the cave box, so the layer would fit around it.


Once we had our basic cardboard shape we added scrunched up brown paper - the kind you find in delivery boxes - to build up the rugged or rocky parts of the island. We attached this using paper tape. It was a bit loose in places but we only needed the tape to hold it until we got to the next step. I also added a cardboard roll on one side, which could be a slide or a slippery slope into shark infested waters, depending on the game.


Next on the to-do list was to add the paper mache. For this I used tissue paper (kitchen roll) and a mixture of 2 parts PVA glue to 1 part water. In total, we added three layers to make our island strong. It was a slow process because we needed to wait a day or two for each layer to properly dry (and in a chilly February it was in no hurry!) but it was worth it so that the island could last a while. At this point I also added some string soaked in PVA glue to the back, near the cave with the idea that this could be vines.


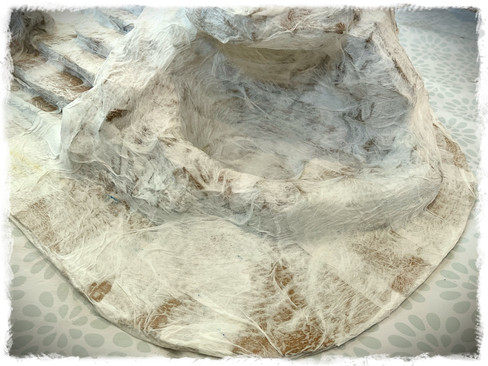


Finally, the paper mache was dry and it was time to bring the island to life.


Comments